
Welcome to the ultimate guide on making bread with milk and butter! If you’re a bread enthusiast looking to elevate your baking skills, you’ve come to the right place. In this comprehensive article, we’ll walk you through the entire process, from selecting the finest ingredients to achieving that perfect golden crust. Get ready to embark on a culinary adventure that will leave your kitchen smelling heavenly and your taste buds craving for more.
BREAD WITH MILK AND BUTTER: The Key to Irresistible Flavor
Selecting the Best Ingredients
When it comes to baking bread with milk and butter, the quality of your ingredients can make all the difference. Opt for fresh, high-quality flour, preferably bread flour for that perfect texture. Choose whole milk for a rich, creamy taste, and don’t skimp on the butter – unsalted butter works best to control the saltiness of the bread.
Preparing the Dough
Making bread from scratch may seem daunting, but with the right technique, it’s a rewarding experience. Start by combining flour, yeast, sugar, and salt in a large mixing bowl. Warm the milk and melt the butter, then gradually add them to the dry ingredients, stirring until a dough forms. Knead the dough on a floured surface until it’s smooth and elastic.
Proofing and Rising
After kneading, place the dough in a lightly greased bowl, cover it with a clean kitchen towel, and let it rise in a warm, draft-free environment. This process, known as proofing, allows the yeast to ferment and the dough to double in size. Patience is key here – a well-risen dough will result in light and fluffy bread.
Baking to Perfection
Once the dough has doubled in size, gently punch it down to release any air bubbles, then shape it into loaves or rolls. Place the shaped dough onto a baking sheet or into greased loaf pans, cover them, and let them rise again until doubled in size. Preheat your oven to the desired temperature, then bake the bread until it’s golden brown and sounds hollow when tapped on the bottom.
Adding Finishing Touches
As the bread bakes, your kitchen will be filled with the irresistible aroma of freshly baked goodness. Once it’s done, remove the bread from the oven and brush the tops with melted butter for a beautiful sheen. Allow the bread to cool slightly before slicing into it – if you can resist the temptation, that is!
Serving and Enjoying
There’s nothing quite like the satisfaction of slicing into a loaf of homemade bread, still warm from the oven. Whether you enjoy it plain, with a generous slather of butter, or as the base for a gourmet sandwich, your efforts will be rewarded with every bite. Share your freshly baked creations with family and friends, and watch as they marvel at your baking prowess.
FAQs About Bread with Milk and Butter:
Making bread from scratch typically takes around 2 to 3 hours, including proofing and baking time.
While whole milk will yield a richer flavor, you can substitute skim milk if desired. However, the bread may be slightly less moist.
Kneading by hand is perfectly fine and can even be therapeutic. Simply follow the same technique of folding and pressing until the dough is smooth and elastic.
Yes, homemade bread freezes well. Allow it to cool completely, then wrap it tightly in plastic wrap and aluminum foil before placing it in the freezer. Thaw at room temperature when ready to enjoy.
Tap the bottom of the loaf – if it sounds hollow, it’s done. You can also insert a thermometer into the center of the loaf; it should register between 190°F to 200°F.
Absolutely! Feel free to customize your bread with your favorite nuts, seeds, or even dried fruits for added flavor and texture.
Conclusion:
Baking Bread with Milk and Butter is not only a delicious endeavor but also a rewarding one. With a bit of patience and practice, you’ll soon master the art of creating homemade bread that rivals those from the finest bakeries. So roll up your sleeves, preheat your oven, and get ready to delight your senses with the irresistible aroma and taste of freshly baked Bread with Milk and Butter.

BREAD WITH MILK AND BUTTER
Ingredients
- 400 ml of warm milk
- 20 grams of sugar 1 tablespoon
- 10 g dry yeast 1 tablespoon
- 80 grams of butter melted
- 2 eggs
- 850 g of tender wheat flour
- 1 large teaspoon of salt
Instructions
- In a container, put the milk, sugar, dry yeast, melted butter and eggs, mix well.
- Add soft wheat flour, then salt and mix.
- Knead to a soft, smooth dough. Then cover and let sit for 1 hour or until double in volume.
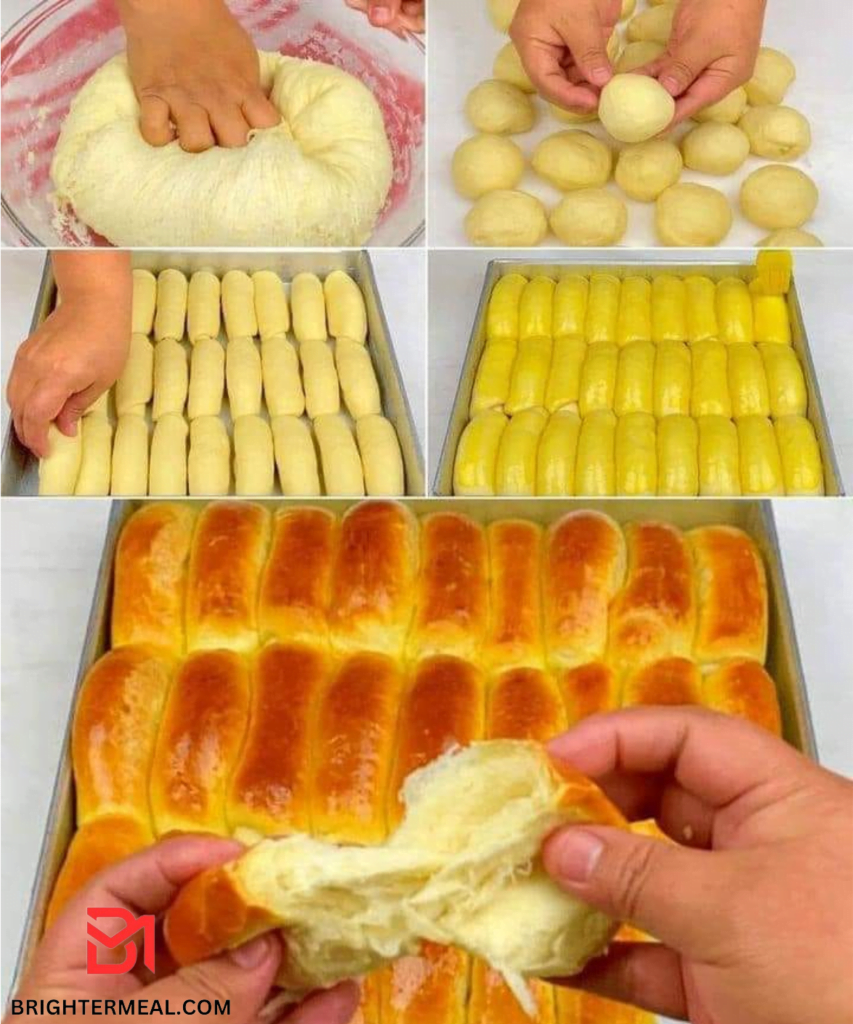
- Get all the air out of the dough.
- Divide into 27-30 servings and form balls, then stretch and roll the dough.
- Place in a greased mold, cover, and leave until double in volume.
- Egg yolk and 1 teaspoon of milk. Bake in a preheated oven at 200°C for 25 minutes.

